Actually, that wasn't the point at all. POINT IS, now that summer is here so is strawberry season and chances are your local supermarket/super farmers' market is overflowing with the stuff, and dear lord almighty I love me some strawberry ice cream. And this particular strawberry ice cream is, as my boyfriend told me, the best ice cream I've ever made. And once again I'm replacing the whole milk and heavy cream with fat-free half-and-half, which I KNOW is so freaking unnatural if you think about it too hard, but as I mentioned once or twice before it's summer and my pool opened this weekend and also my ass is big enough as it is, thank you very much.
For a quart + a heaping bowl for immediate consumption you'll need:
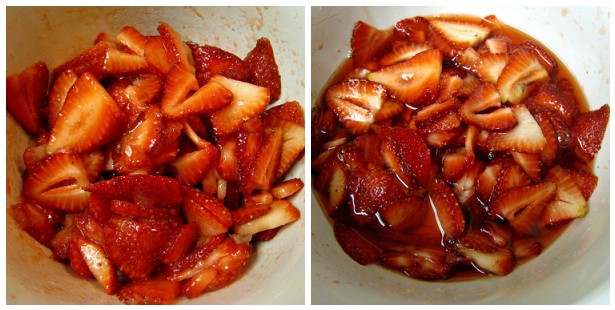
1 pint of strawberries, sliced
3 cups of fat-free half-and-half
3/4 cup sugar (use 2/3 cup if your berries are particularly sweet)
Pinch of salt
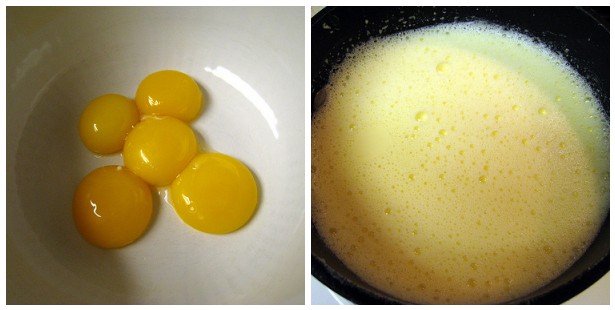
5 large egg yolks
1/4 teaspoon vanilla extract
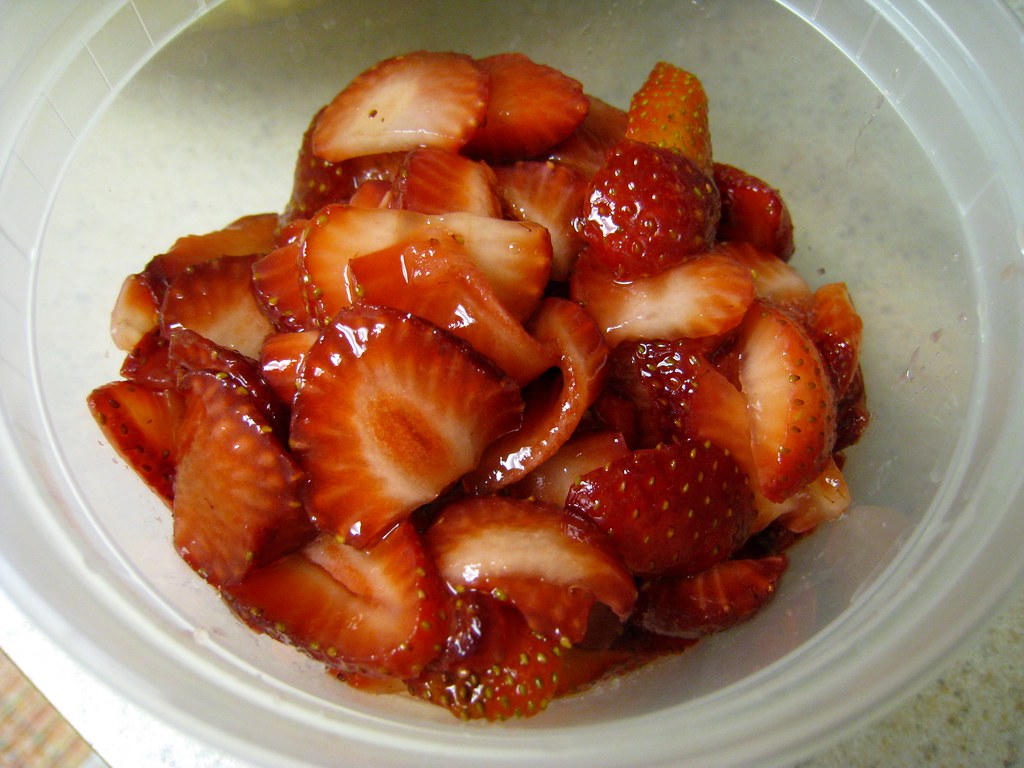
First you're gonna want to macerate your strawberries, and all that means is you're gonna toss your sliced strawberries in a bowl with about 1/3 cup of the sugar and let that sit around for an hour until the strawberries get all juicy. I have no idea why this happens, but I'm pretty sure it has something to do with science. Also unicorns.
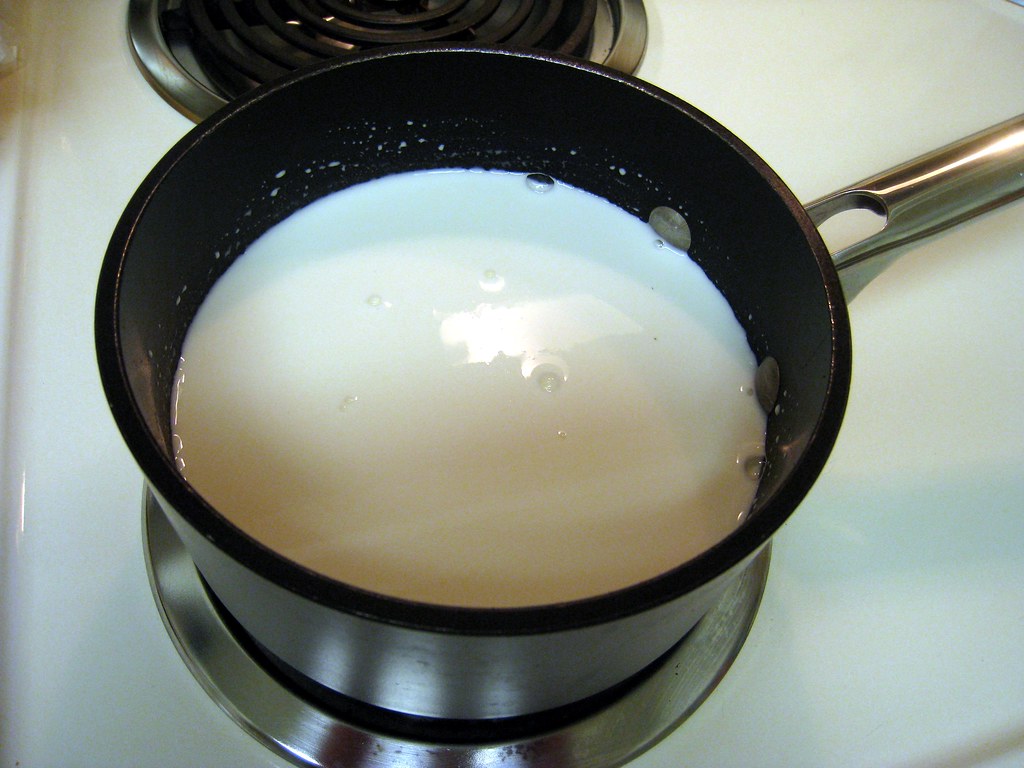
Next, heat up 2 cups of the freaky-deaky fat-free half-and-half, the rest of the sugar, and a pinch of salt in a medium saucepan until everything gets all warm and steamy, but not boiling. (Sound familiar? That's because this is how you make ice cream. It's all the same. Only the names have changed.)
Plop your egg yolks in a bowl and whisk them all together. Now you are going to temper those with a little of your warm cream mixture by slowly pouring a little of it at a time into the egg yolks, whisking constantly so that the egg yolks get incorporated into the cream without scrambling first. Because scrambled eggs are good for breakfast but not for ice cream (as far as I know).
Now to make a custard! Scrape that all that back into the saucepan, stirring it constantly over medium heat with a silicon spatula, scraping the bottom and sides of the pot as you stir. In about 10 minutes, you'll notice the mixture has thickened considerably. Once it coats the spatula so that you can run your finger across the coating and have it not run (if you have an instant-read thermometer, it should register about 170 degrees), you're done. (With this step, anyway.)
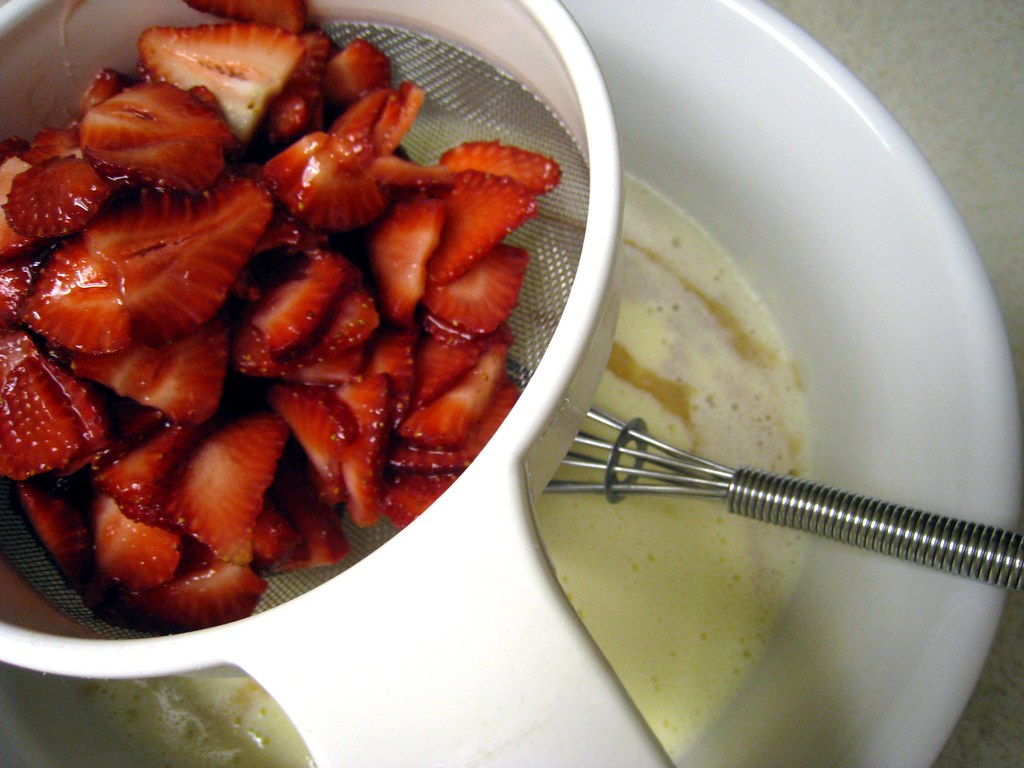
Pour the remaining cup of fat-free half-and-half into a large bowl, and set a mesh strainer on top. Now pour your custard through the strainer and stir it into the cream. This will catch any pieces of curdled egg that may have curdled on accident. Don't worry, it's common. It happens to most guys. It's not a big deal.
Strain your strawberries through the strainer, but don't strain yourself as you make sure all the juices get into the bowl. (See what I did there?) Stick these strawberries in the fridge and save them for later.
Finally, add in the vanilla and stir it all together.
And now we Ctrl+C and Ctrl+V:
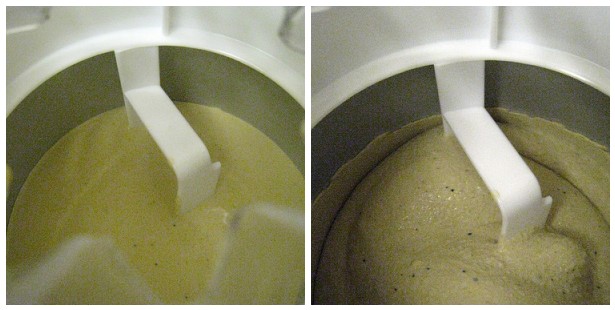
Here's the big secret to making ice cream at home: the colder your base is before you put it in the machine, the better. So wrap up your bowl in plastic wrap and stick it in the fridge at least overnight. Or, as Jack Bauer has taught us, 24 hours is better. Then, fix up your ice cream maker however you're s'posed to fix it up, flip that baby on, and pour your custard in.

And watch the magic happen!
Also, listen to the magic happen!
Magic is loud!
After 20ish minutes of loud magic, add your strawberries. By saving them until the last 5 minutes, you can keep them from getting mushed up into unrecognizable pulp during the churning process.
After they've all been incorporated, scoop your ice cream into a container and stick it in the freezer for another couple hours. Then? YUM.