30.9.09

About Brussels Sprouts

Le sprouts from Brussels get a bad rap. When overcooked, le sprouts from Brussels release a chemical compound called sinigrin, adding a certain pungent and sulfuric aroma that is just about as gross as it sounds. So if you like cabbage, but hate le sprouts from Brussels, chances are whoever it was who cooked them for you was a shit-ass-motherfucking bad cook. It's not mean if it's true.

I have about a billion yummy brussels spouts recipes, but this one is by far the most basic and a good introduction for you, the future brussles sprouts lover. Here's your shopping list, and an apology in advance for the crappy picture quality (someone stole my camera when I was in New Orleans, and this one is currently being held together by a rubber band):
  • 1 pound fresh brussels sprouts
  • 2 tablespoon butter
  • Salt and pepper to taste
  • 1 teaspoon fresh lemon juice
First you need to trim your sprouts. Do this with your paring knife by cutting off any excess stem at the base of your sprout, and removing any loose leaves around the bulb. Now boil the spouts in salted water for 3-4 minutes until just tender. (Just stab a sprout with a fork to judge tenderness. Incidentally, this method also works on boys.)


Strain these in a colander and immediately dump them in a bowl of ice water to keep the color bright green and stop the cooking process. (This is called blanching, for those of you keeping score.)


Once they have cooled, cut your spouts into halves.

Melt the butter in a wide sauté pan over medium-high heat. Add the brussels sprout halves and a pinch or two of salt and pepper.


Cook your spouts for several minutes, tossing occasionally until they have started to brown and have finished cooking through. Whatever you do, DO NOT OVERCOOK THEM, because remember that thing I said about sinigrin? Yeah, so if you do decide to overcook them, your sprouts will be bitter. Don't say I didn't warn you.

Remove the pan from the heat and add the lemon juice, tossing to coat. Add some more salt and pepper if you need it.

Now stick them on a plate and prepare to fall in love with your next vegetable. I SAID PREPARE, GODDAMNIT! Ahem.

25.9.09

About My Boyfriend's Mother's Kugel

Today is my boyfriend's 47th birthday, and in honor of this milestone I thought I would share his mother's kugel recipe, which isn't as good as his grandmother's stuffed cabbage recipe, and definitely not as good as my mother's latke recipe, but I'm not terribly convinced I even like kugel all that much. I mean it's fine, whatever, but I'm not super in love with it or anything, because, I don't know. It's like this mutant side dish/dessert thing that really fucks with my mind, you know? But if you are the kind of person who enjoys a good mind fuck every now and again, I am assured that you'll absolutely LOVE this. So here goes:
  • 1 lb. wide egg noodles

(See?)
  • 16 oz. sour cream
  • 16 oz. cottage cheese
  • 5 eggs
  • 2 tsp. baking powder
  • 1/2-3/4 cup sugar (I like half a cup, Seth likes three-quarters; it all depends on how sweet you'd like your kugel to be)
  • 1 tsp. salt
  • 2 tbsp. butter melted into a 9x13 baking dish
  • 1/2 cup raisins (optional)
  • Cinnamon and brown sugar for sprinkling
Preheat the oven to 350F degrees.

Boil the noodles for 4 minutes, which won't cook them all the way through but this is a good thing! Don't worry about it! And then drain them in a colander.


Meanwhile, in a large bowl, beat your eggs well, and then mix in the sour cream, cottage cheese, baking powder, sugar, salt, and optional raisins. (I actually meant to add raisins, but I forgot. Oops.)


And now add the noodles. Stir it good. St-stir it real good.


Pour this mixture into your buttered 9x13 baking dish, sprinkle the top with cinnamon and brown sugar, and then bake that bad boy (or girl, whatever) for 30-45 minutes, until the top is brown and crunchy and the kugel is just set.


Let that sit for another 15-20 minutes or so, and then slice and serve.


Now, there will be a lot of this left over. Like, a whole lot. But don't worry about it! Leftovers can be wrapped and frozen so you can have kugel whenever you want. You know, if you want. Whatever.

Happy 47th birthday, boyfriend!

3.9.09

About Sauteed Tilapia

A lot of you know me pretty well by now, so it should come as no surprise that I trend towards the complex. I'm way too thinky and I live inside my own head way too much and I generally just make a mess out of things. Why I am like this I do not know, but there is certainly never a dull moment around these parts.

THAT SAID, sometimes simple is best. And this recipe is most definitely simple. Short-bus simple, even. And super healthy to boot. What we're booting I have no idea, so let's just say we're booting claustrophobia.

Yeah, I don't know either.

All you'll need is:
  • 2 fillets of tilapia (or any other fish, really)
  • The spice mixture of your choice (or any combination of spices, really)
  • A little extra virgin olive oil
  • A non-stick pan
  • A couple lemon wedges
First up, sprinkle your seasonings on both sides of your fish. This night I happened to use some Tony Chachere's, but there's also this Bayou Blackening Spice a company out of Virginia makes, and I'm not sure if you can get it everywhere but if you can, do it because IT IS AWESOME.


Next up, heat just a little bit of oil in your pan over medium-high heat. Once you're hot enough (but really, when are you not?), add in your fillets.


Now here's a fun fact about cooking fish, although I suppose "fun" is probably not a very good word to use in this situation, because it's not "fun" like reading or drinking or Wii, so whatever, fill in your own adjective I guess. Wait, where was I?

OH YEAH.

Fun fact: you cook your fish way more on one side than you do the other. We saw this once before with some salmon fillets, and the same goes here, only since these fillets are so thin it'll take far less total cooking time. And how long is this cooking time? About 3 minutes on your first side, and 1 minute on your flip side.

Aaaaaand you're ready for the plate.


Add a squidge of lemon and you've got yourself a simple, healthy, delicious dinner.

About Toasted Israeli Couscous with Zucchini

Alex and I used to wander into the UC at Tulane University round about lunch time and every now and again we'd hit the jackpot: Greek Salad Day. Greek Salad Day was the best day of all the days because (a) the Greek salads were ridiculously awesome, and (2) South Park.

Do what now?

Alex and I used to wander around Tulane University quoting Eric Cartmen INORDINATELY, particularly the classic line, "YEAH I WANT CHEESY POOFS!", because yeah, I would like some cheesy poofs, please. And so one fateful day Alex and I were waiting patiently in line, side by side in the UC at Tulane University, watching our ridiculously awesome Greek salads being constructed. And I don't remember which of us said it, but I do remember that the nice lady behind the counter was certainly not expecting her innocent query, "Would you like some couscous?" to be answered with "YEAH I WANT COUSCOUS!" Because yeah, we would like some couscous, please.

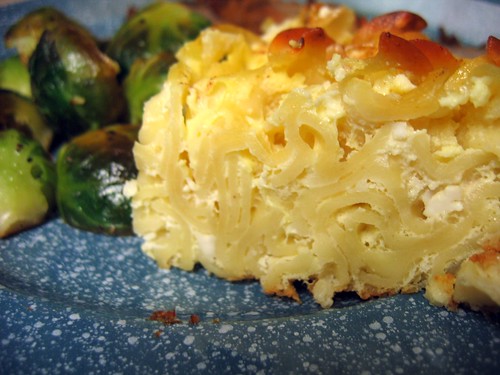
This is not that kind of couscous. My boyfriend does not like that kind of couscous. And I don't know, maybe it's because he's Jewish or something, but the only couscous he likes is Israeli couscous, even though he only had Israeli couscous for the first time, like, three months ago.

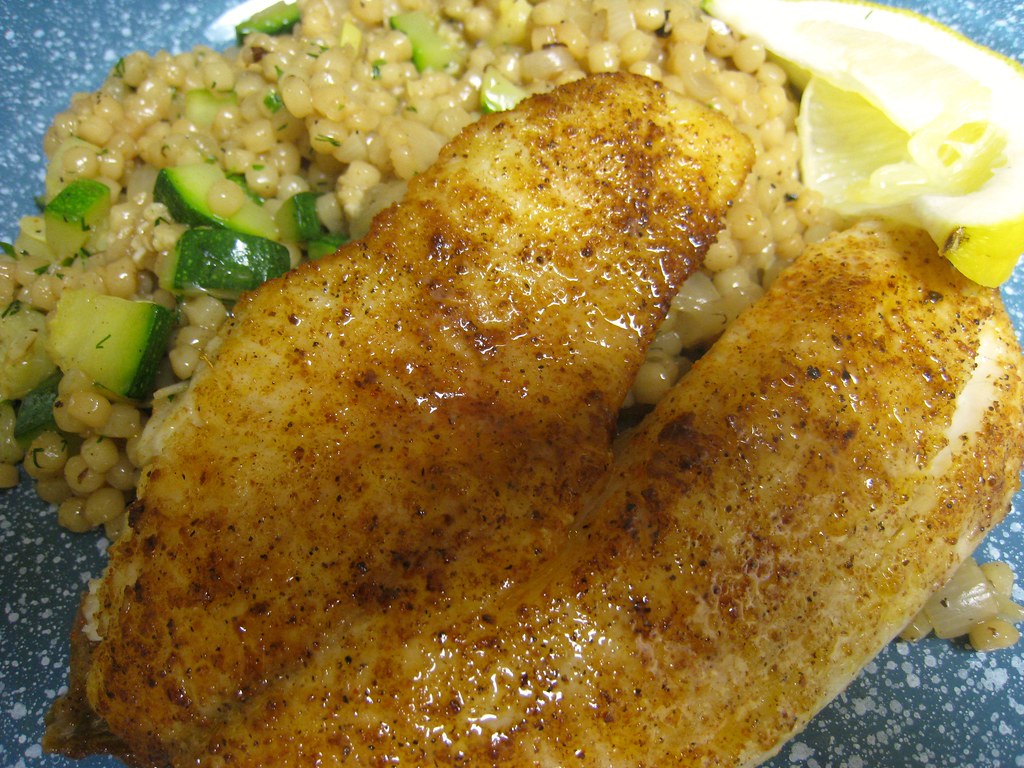
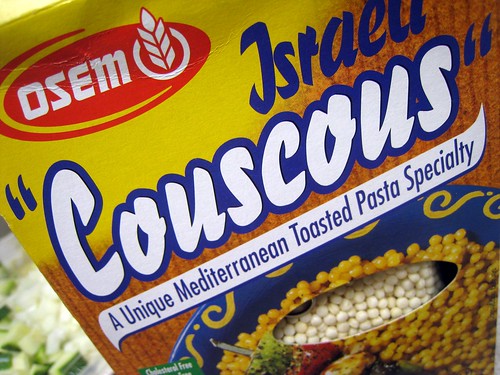
What is Israeli couscous? Why, it's a unique Mediterranean toasted pasta specialty. Don't believe me? Fine, see for yourself:


Israeli couscous is also ridiculously awesome, because really it's just pasta, but it's tender and chewy and completely unlike pasta. Plus you can add all kinds of things to it, like zucchini for instance! So for four servings, you'll need:
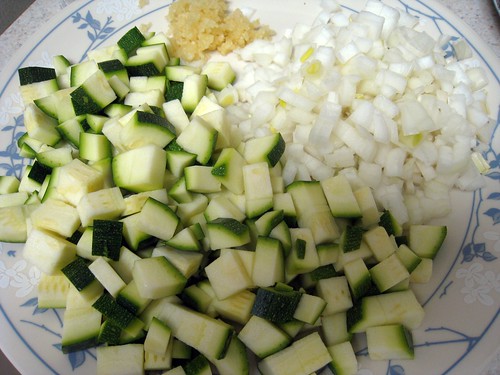
  • 1 large zucchini, cut into small cubes
  • 1 cup Israeli couscous
  • 1 1/4 cups chicken broth
  • 1 small onion, diced
  • 2 medium garlic cloves, minced
  • Olive oil, salt, and pepper
  • 2 tablespoons of assorted fresh herbs, minced
Once you have your mis en place all placed,


heat up a tablespoon or so of extra virgin olive oil in a medium saucepan over medium-high heat until it gets all shimmery and starts to smoke. Then add your zucchini (or summer squash or bell pepper or eggplant or heck, all of the above), a pinch of salt, some freshly cracked black pepper, and a couple shakes of any other seasonings you like (like cumin or coriander or paprika or heck, all of the above). Then saute that down until your zucchini has lost a lot of its liquid and is starting to brown all up. Sort of like it went to the beach and got a suntan. Only not like that at all. Shut up, Kat.

(This should only take a couple minutes.)


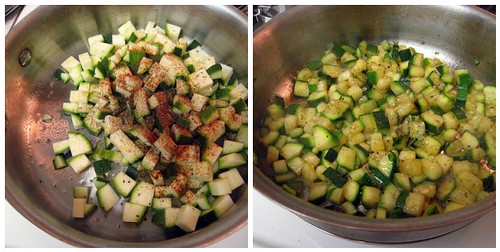
Dump all that zucchini onto a plate.

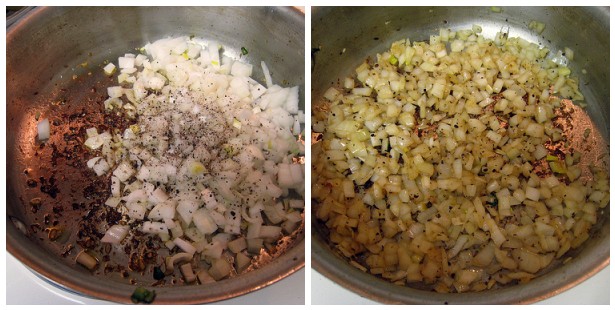
Return your pan to the heat and maybe add a drop or two of oil if you think you need it, then dump in your onions with another pinch of salt and some freshly cracked black pepper, and saute that until it is softened and starting to brown, not AT ALL like it went to the beach and got a suntan.

(This should only take a few minutes.)


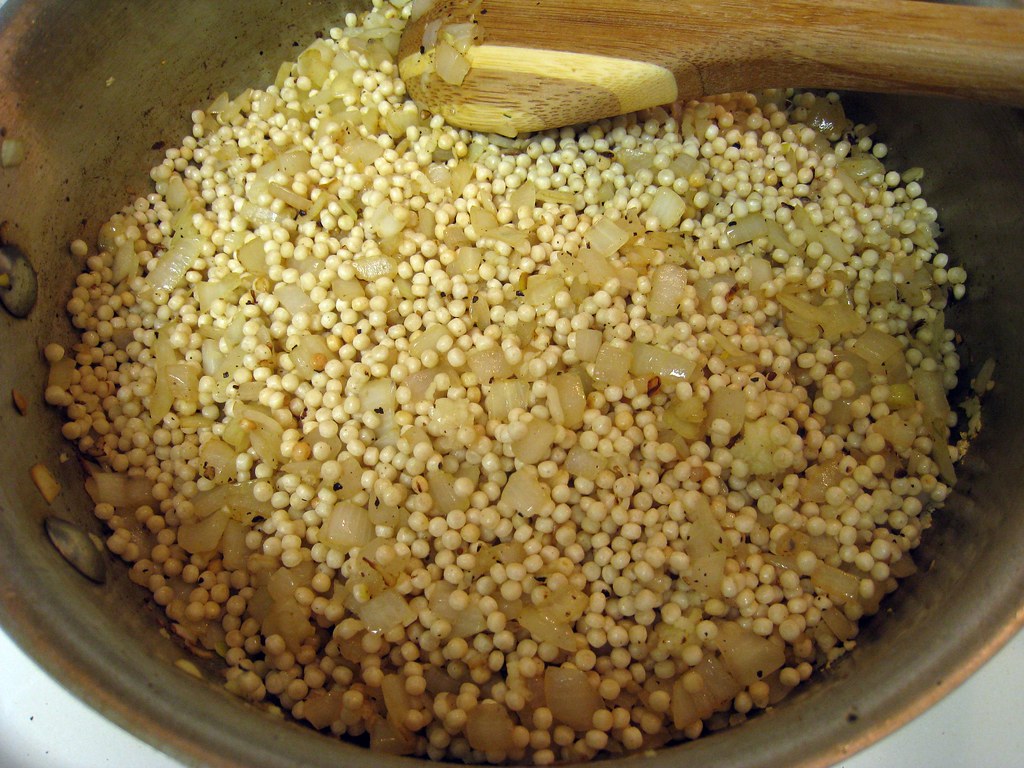
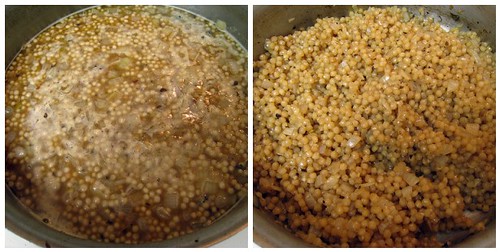
Next up, add in your garlic and your couscous, and toast that all up for about a minute.


Oh yeah, stick your chicken broth in the microwave for a minute or two until it boils. Then pour it into the pan and stir everything up, making sure you scrape up any fond from the bottom of the pan.

Turn your heat down to low and slap a lid on that baby, and let it simmer away for about 10 minutes, stirring occasionally. Your couscous should absorb pretty much all of the liquid, making it slightly chewy but not hard.


Return your sauteed zucchini to the pan and dump in your herbs.


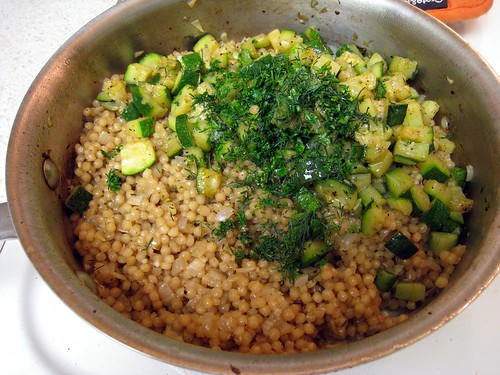
Give it healthy stir to incorporate all of your ingredients, put the lid back on your pan, and let that heat back up for a minute or two more. And just like that (well, not JUST like that, but close enough), you are ready to serve.


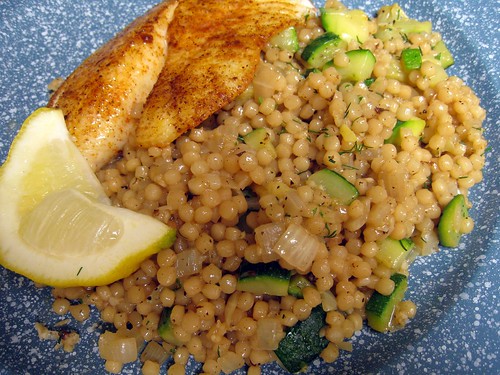
(Oh, and I find a squidge of lemon over everything really brightens things up, kind of like going to the beach and . . . oh, never mind.)